
1993 Allante stereo upgrade


Thread Starter
|
Tech Certified Members
Joined: Jul 2007
Posts: 202
I wanted a better sounding system then what was in my 'stock' Allante -
Having the 93 I didn't have the worries of the Bose system, but the system that was in there was pretty blah - no bottom end, and the sound behind me was nonexistent.
I had pulled the front speakers (which are amp'd) and took them to a local car stereo place. They looked at them - said "do the system - $2000"). The fronts are in decent shape, and since they are amp'd - I decided to leave them alone for now. And the funny size is a bit worrisome - 7"
I talked to some friends at a performance car audio magazine I know. After a lot of discussion (and also seeing what I could beg for free) I ended up with a Kenwood amp, a couple of Infiniti speakers and a Kenwood power subwoofer
I took out the wall between the trunk and the passenger compartment first and also pulled the side panels to get to the rear speakers and battery.
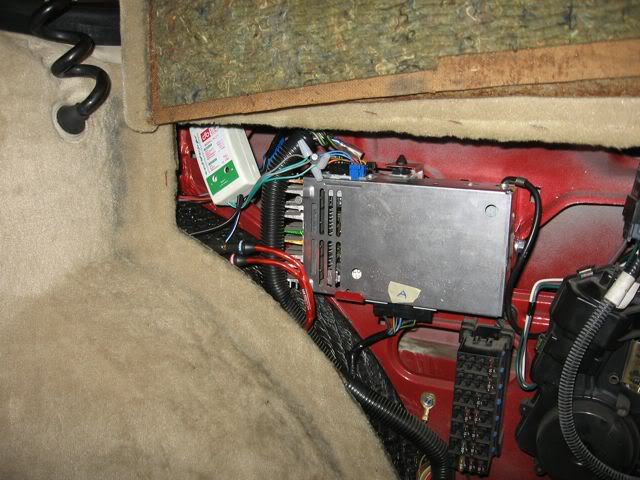
I pulled the receiver from the rear panel - and added a box that converted the rear speaker wires to RCA jacks. The rear speakers in the '93 are only powered from the receiver - no separate amps on them.
The rear speakers were the first to go - I put in 5-1/4 Infiniti Reference 2 way speakers - I needed to leave the grill on them to keep the tweeter away from the stock grill - so I just drilled holes into the Infiniti grill
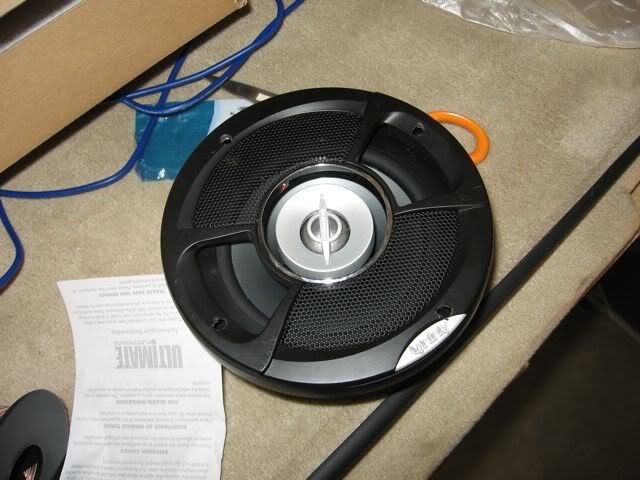
I then just installed them on top of the original rubber ring in the enclosures.
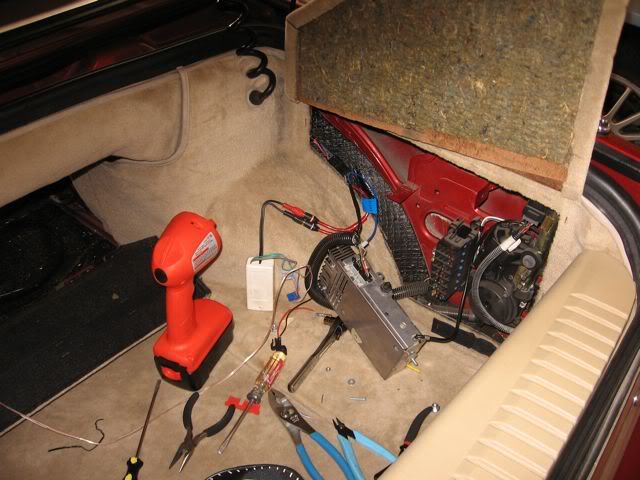
I had gotten an Optima battery - so as Stealth pointed out to me - it is easy to install ICE - just use the top terminal that the car doesn't use (note - I was at 'test' mode at this photo - I always install with the negative ground disconnected)
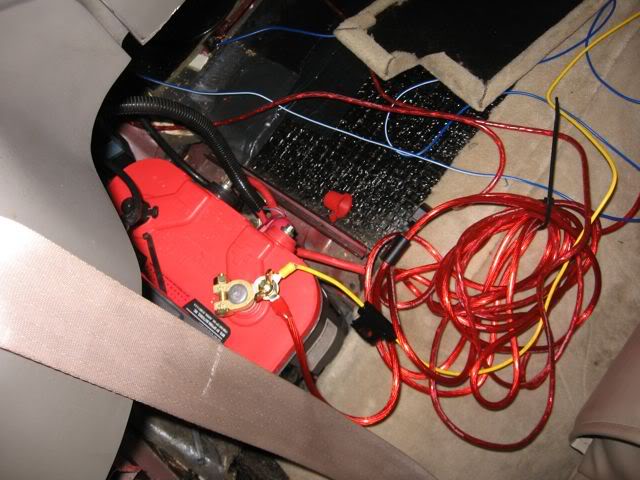
At this point, I was ready to reinstall the receiver - I had spliced in the speaker wires - mounted the wire converter box - and spliced in the ignition wire for the amps.
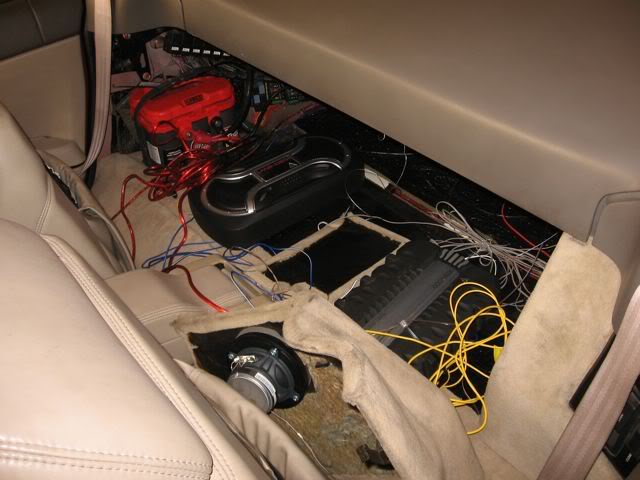
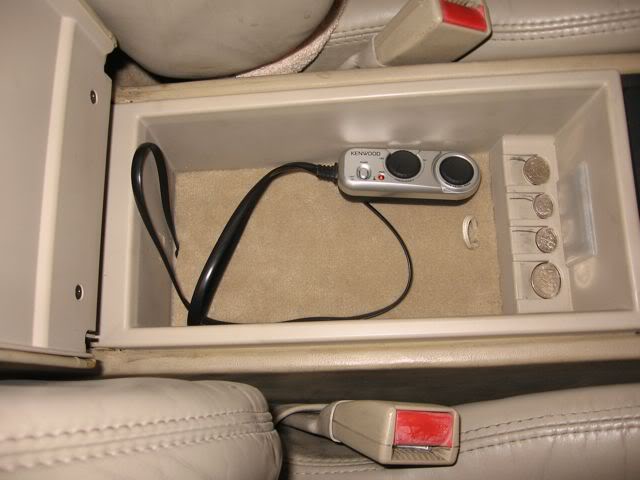
I installed the power amps controller into the console of the car - I took out the small tray - drilled a 1/2" hole and threaded the controller beneath the console.
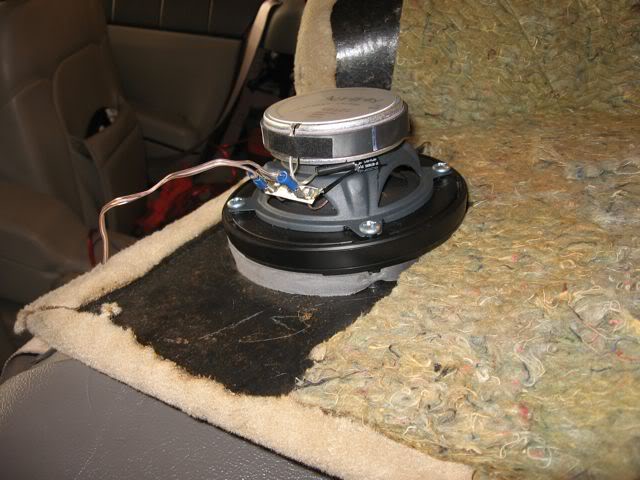
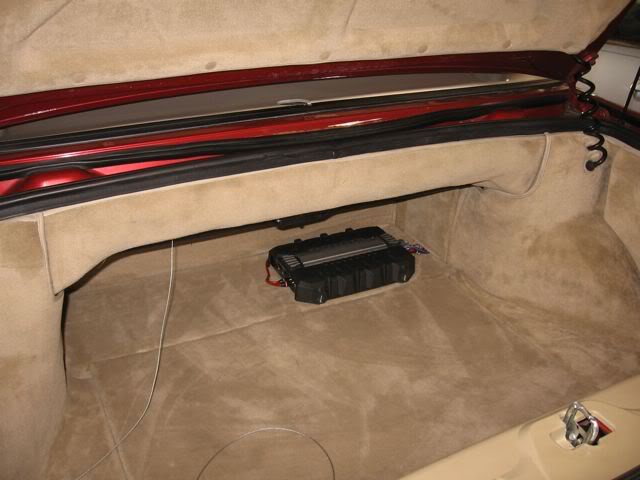
I needed to add a strong base to attach the sub woofer to - so I took a small square of plywood and drilled holes in it - I just taped and slit the carpet above it - at the screw locations - so if I need to pull this - the carpet will not be drilled.
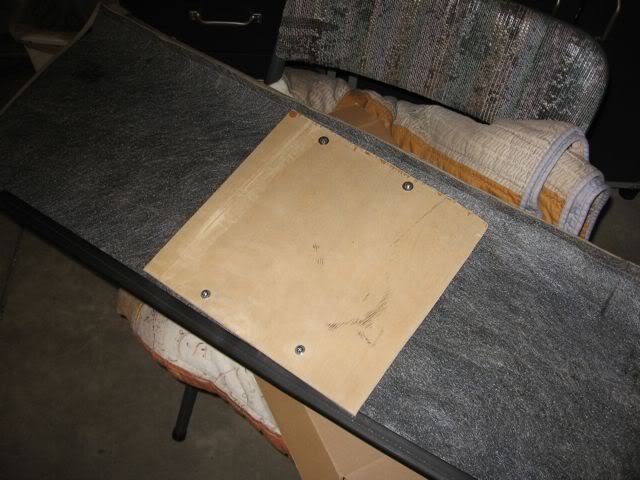
I also needed to cut a small notch into the carpet hold-down bar - so I could channel the sub woofers cords through it -
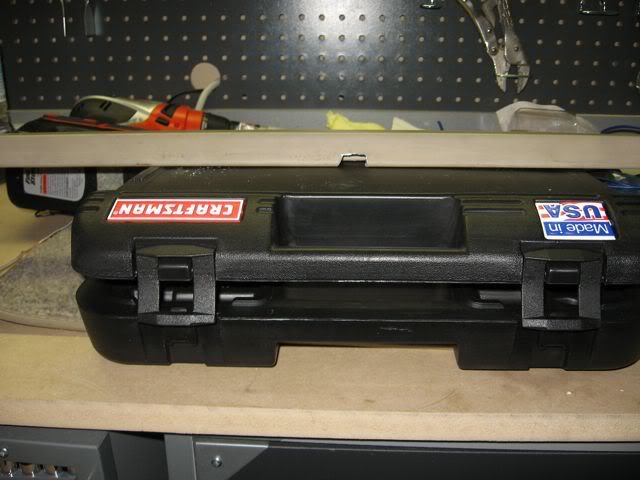
This is what the sub woofer looks like installed - I still need to find a cord cover I like for the 2" of cords peeking out - and also some black screws and wing nuts. I like the wing nuts - I can pull this unit in about 3 minutes - and then the pull-down panel between the passenger compartment and the trunk can be lowered completely.

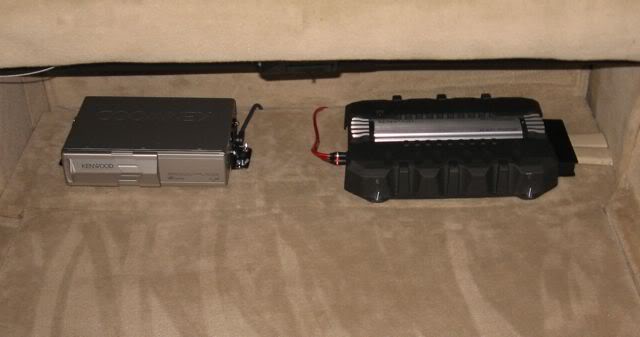
And this is the amp in the trunk - once again I need to find that 'perfect' cord cover and something to cover the screw connectors (I had to suffer through a bizarre zipper arcing incident - and ended up driving 400+ miles humming Black Eyed Pea's "My Hump" - something I never want to do again). Also black screws and nuts - when I can find them.
The total install was about 10 hours (I am very slow, and make many tiny mistakes). The one thing I wouldn't do again is taking out the panel between the passenger compartment and the trunk. It took about 1-1/2 hours to reinstall - the sprung hinges and the location was miserable - I spent wayyyy too much time in the trunk. I think there would be some way to do the install without this step.
It was well worth it (although the free parts didn't hurt). The sound is amazing - full and rich. I won't be winning any power amp contests - and I won't be rattling windows in cars 1/2 block away - but very decent lower end (I love the controller - you can customize the lower end - I push it on rock n' roll, back off for classical).
UPDATE - added CD changer/Sirrius radio
Another Kenwood addition that is a 6CD changer and also is a Sirrius radio tuner (if I buy the subscription - haven't suc***bed yet...)

Having the 93 I didn't have the worries of the Bose system, but the system that was in there was pretty blah - no bottom end, and the sound behind me was nonexistent.
I had pulled the front speakers (which are amp'd) and took them to a local car stereo place. They looked at them - said "do the system - $2000"). The fronts are in decent shape, and since they are amp'd - I decided to leave them alone for now. And the funny size is a bit worrisome - 7"
I talked to some friends at a performance car audio magazine I know. After a lot of discussion (and also seeing what I could beg for free) I ended up with a Kenwood amp, a couple of Infiniti speakers and a Kenwood power subwoofer
I took out the wall between the trunk and the passenger compartment first and also pulled the side panels to get to the rear speakers and battery.
I pulled the receiver from the rear panel - and added a box that converted the rear speaker wires to RCA jacks. The rear speakers in the '93 are only powered from the receiver - no separate amps on them.
The rear speakers were the first to go - I put in 5-1/4 Infiniti Reference 2 way speakers - I needed to leave the grill on them to keep the tweeter away from the stock grill - so I just drilled holes into the Infiniti grill
I then just installed them on top of the original rubber ring in the enclosures.
I had gotten an Optima battery - so as Stealth pointed out to me - it is easy to install ICE - just use the top terminal that the car doesn't use (note - I was at 'test' mode at this photo - I always install with the negative ground disconnected)
At this point, I was ready to reinstall the receiver - I had spliced in the speaker wires - mounted the wire converter box - and spliced in the ignition wire for the amps.
I installed the power amps controller into the console of the car - I took out the small tray - drilled a 1/2" hole and threaded the controller beneath the console.
I needed to add a strong base to attach the sub woofer to - so I took a small square of plywood and drilled holes in it - I just taped and slit the carpet above it - at the screw locations - so if I need to pull this - the carpet will not be drilled.
I also needed to cut a small notch into the carpet hold-down bar - so I could channel the sub woofers cords through it -
This is what the sub woofer looks like installed - I still need to find a cord cover I like for the 2" of cords peeking out - and also some black screws and wing nuts. I like the wing nuts - I can pull this unit in about 3 minutes - and then the pull-down panel between the passenger compartment and the trunk can be lowered completely.
And this is the amp in the trunk - once again I need to find that 'perfect' cord cover and something to cover the screw connectors (I had to suffer through a bizarre zipper arcing incident - and ended up driving 400+ miles humming Black Eyed Pea's "My Hump" - something I never want to do again). Also black screws and nuts - when I can find them.
The total install was about 10 hours (I am very slow, and make many tiny mistakes). The one thing I wouldn't do again is taking out the panel between the passenger compartment and the trunk. It took about 1-1/2 hours to reinstall - the sprung hinges and the location was miserable - I spent wayyyy too much time in the trunk. I think there would be some way to do the install without this step.
It was well worth it (although the free parts didn't hurt). The sound is amazing - full and rich. I won't be winning any power amp contests - and I won't be rattling windows in cars 1/2 block away - but very decent lower end (I love the controller - you can customize the lower end - I push it on rock n' roll, back off for classical).
UPDATE - added CD changer/Sirrius radio
Another Kenwood addition that is a 6CD changer and also is a Sirrius radio tuner (if I buy the subscription - haven't suc***bed yet...)

Super Moderator
Joined: Feb 2007
Posts: 3,945
ORIGINAL: foxpaws
I wanted a better sounding system then what was in my 'stock' Allante -
Having the 93 I didn't have the worries of the Bose system, but the system that was in there was pretty blah - no bottom end, and the sound behind me was nonexistent.
I had pulled the front speakers (which are amp'd) and took them to a local car stereo place. They looked at them - said "do the system - $2000"). The fronts are in decent shape, and since they are amp'd - I decided to leave them alone for now. And the funny size is a bit worrisome - 7"
I talked to some friends at a performance car audio magazine I know. After a lot of discussion (and also seeing what I could beg for free) I ended up with a Kenwood amp, a couple of Infiniti speakers and a Kenwood power subwoofer
I took out the wall between the trunk and the passenger compartment first and also pulled the side panels to get to the rear speakers and battery.

I pulled the receiver from the rear panel - and added a box that converted the rear speaker wires to RCA jacks. The rear speakers in the '93 are only powered from the receiver - no separate amps on them.

The rear speakers were the first to go - I put in 5-1/4 Infiniti Reference 2 way speakers - I needed to leave the grill on them to keep the tweeter away from the stock grill - so I just drilled holes into the Infiniti grill

I then just installed them on top of the original rubber ring in the enclosures.

I had gotten an Optima battery - so as Stealth pointed out to me - it is easy to install ICE - just use the top terminal that the car doesn't use (note - I was at 'test' mode at this photo - I always install with the negative ground disconnected)

At this point, I was ready to reinstall the receiver - I had spliced in the speaker wires - mounted the wire converter box - and spliced in the ignition wire for the amps.

I installed the power amps controller into the console of the car - I took out the small tray - drilled a 1/2" hole and threaded the controller beneath the console.

I needed to add a strong base to attach the sub woofer to - so I took a small square of plywood and drilled holes in it - I just taped and slit the carpet above it - at the screw locations - so if I need to pull this - the carpet will not be drilled.

I also needed to cut a small notch into the carpet hold-down bar - so I could channel the sub woofers cords through it -

This is what the sub woofer looks like installed - I still need to find a cord cover I like for the 2" of cords peeking out - and also some black screws and wing nuts. I like the wing nuts - I can pull this unit in about 3 minutes - and then the pull-down panel between the passenger compartment and the trunk can be lowered completely.

And this is the amp in the trunk - once again I need to find that 'perfect' cord cover and something to cover the screw connectors (I had to suffer through a bizarre zipper arcing incident - and ended up driving 400+ miles humming Black Eyed Pea's "My Hump" - something I never want to do again). Also black screws and nuts - when I can find them.

The total install was about 10 hours (I am very slow, and make many tiny mistakes). The one thing I wouldn't do again is taking out the panel between the passenger compartment and the trunk. It took about 1-1/2 hours to reinstall - the sprung hinges and the location was miserable - I spent wayyyy too much time in the trunk. I think there would be some way to do the install without this step.
It was well worth it (although the free parts didn't hurt). The sound is amazing - full and rich. I won't be winning any power amp contests - and I won't be rattling windows in cars 1/2 block away - but very decent lower end (I love the controller - you can customize the lower end - I push it on rock n' roll, back off for classical).
I wanted a better sounding system then what was in my 'stock' Allante -
Having the 93 I didn't have the worries of the Bose system, but the system that was in there was pretty blah - no bottom end, and the sound behind me was nonexistent.
I had pulled the front speakers (which are amp'd) and took them to a local car stereo place. They looked at them - said "do the system - $2000"). The fronts are in decent shape, and since they are amp'd - I decided to leave them alone for now. And the funny size is a bit worrisome - 7"
I talked to some friends at a performance car audio magazine I know. After a lot of discussion (and also seeing what I could beg for free) I ended up with a Kenwood amp, a couple of Infiniti speakers and a Kenwood power subwoofer
I took out the wall between the trunk and the passenger compartment first and also pulled the side panels to get to the rear speakers and battery.
I pulled the receiver from the rear panel - and added a box that converted the rear speaker wires to RCA jacks. The rear speakers in the '93 are only powered from the receiver - no separate amps on them.
The rear speakers were the first to go - I put in 5-1/4 Infiniti Reference 2 way speakers - I needed to leave the grill on them to keep the tweeter away from the stock grill - so I just drilled holes into the Infiniti grill
I then just installed them on top of the original rubber ring in the enclosures.
I had gotten an Optima battery - so as Stealth pointed out to me - it is easy to install ICE - just use the top terminal that the car doesn't use (note - I was at 'test' mode at this photo - I always install with the negative ground disconnected)
At this point, I was ready to reinstall the receiver - I had spliced in the speaker wires - mounted the wire converter box - and spliced in the ignition wire for the amps.
I installed the power amps controller into the console of the car - I took out the small tray - drilled a 1/2" hole and threaded the controller beneath the console.
I needed to add a strong base to attach the sub woofer to - so I took a small square of plywood and drilled holes in it - I just taped and slit the carpet above it - at the screw locations - so if I need to pull this - the carpet will not be drilled.
I also needed to cut a small notch into the carpet hold-down bar - so I could channel the sub woofers cords through it -
This is what the sub woofer looks like installed - I still need to find a cord cover I like for the 2" of cords peeking out - and also some black screws and wing nuts. I like the wing nuts - I can pull this unit in about 3 minutes - and then the pull-down panel between the passenger compartment and the trunk can be lowered completely.
And this is the amp in the trunk - once again I need to find that 'perfect' cord cover and something to cover the screw connectors (I had to suffer through a bizarre zipper arcing incident - and ended up driving 400+ miles humming Black Eyed Pea's "My Hump" - something I never want to do again). Also black screws and nuts - when I can find them.
The total install was about 10 hours (I am very slow, and make many tiny mistakes). The one thing I wouldn't do again is taking out the panel between the passenger compartment and the trunk. It took about 1-1/2 hours to reinstall - the sprung hinges and the location was miserable - I spent wayyyy too much time in the trunk. I think there would be some way to do the install without this step.
It was well worth it (although the free parts didn't hurt). The sound is amazing - full and rich. I won't be winning any power amp contests - and I won't be rattling windows in cars 1/2 block away - but very decent lower end (I love the controller - you can customize the lower end - I push it on rock n' roll, back off for classical).
Fox,
just to clarify .. you keep using the phrase "I did ..." .. it that correct?
you really know what them tools are for? Do i see "POWER TOOLS?"
I know better than that, but you know the other guys can start wondering.
- the sub-woofer install plate .. nice .. nice idea. Good planning
- the RED TOP GEL, looks good in there, nice power hook up. Try that with "vented" Delco.
Two questions ...
1. How do the sub-woofer and rear speakers functions integrate with the controls in the D.I.C. ?
IS the "sub-woofer" a simple on / off device?
2. Your TOP 3 Rock & Roll and Classical?
You might have read that I favor the likes of Pink Floyd, Led Z., Jimmy Hendrix, Beethoven, Vivaldi,
and many others - but there you have my basics loaded via the FM Modulators and USB drive,
ohh, i should also mention the collection of Cadillac songs someone was nice enough to provide.
One request .. can you RE-Title? something like < 1993 ALLANTE stereo upgrade >
.
Thread Starter
|
Tech Certified Members
Joined: Jul 2007
Posts: 202
Those are my tools, and YES I did the install all by my little lonesome self -
The stereo guys did come up with the ideas for the components though.
The rears (including the sub) are all tied into the receiver - so the DIC still controls them (mostly). The fader, the bass/treble, balance, all can be controlled just like any other Allante - I wanted to keep it looking and acting like stock.
The sub woofer does have that other little controller that lives in my center console - it has both a cross-over and a min/max setting. The cross-over is nice - so I can control the frequency when the crossover from the rear speakers to the sub woofer occurs.
First song played... Eurythmics' "Sweet Dreams".
Next song... Marilyn Manson's cover of Depeche Mode's "Personal Jesus".
And Bloodhound Gang's "The Bad Touch"
Then, Zappa's "Bolero".
Finally - Vaughan Williams' "Fantasia on a Theme by Thomas Tallis"
And yes, My Hump - If only there was someone who could of sang the guy's part....
What you gon' do with all that junk?
All that junk inside your trunk?
,,,My hump, my hump.
My lovely lady lumps....
Maybe not though - not for 400+ miles...
And my pictures certainly aren't good enough to repeat - it is a little overwhelming...


Thread
Thread Starter
Forum
Replies
Last Post